


The first day after a hip replacement is often a blur of anaesthetic wearing off, nurses helping you sit up, and the strange feeling of having a new joint that’s both sturdy and unfamiliar. At that point, there's a shared desire. They want to know what they should do, what they shouldn’t do, and how to recover without making a mistake.
That’s where hip replacement exercises matter. They aren’t an optional extra. They’re the practical work that helps you rebuild walking confidence, restore hip muscle control, and get back to ordinary life, whether that means a commute into Bristol, long days on your feet, or training again.
Your First Steps After Hip Replacement Surgery
The first steps after surgery rarely feel elegant. You’re usually holding a frame or crutches, concentrating hard, and trying to trust the operated side. That’s normal. Early movement is less about performance and more about teaching your body that the new hip can support you safely.
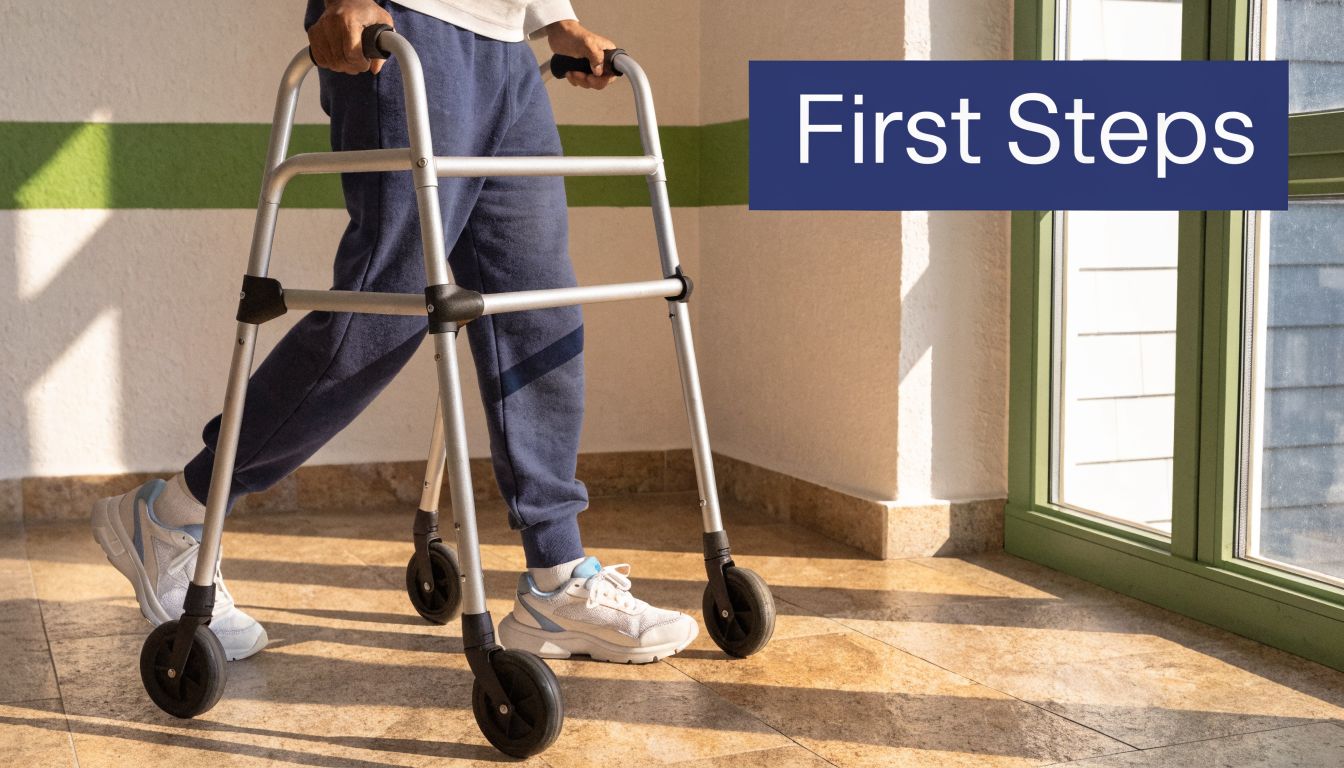
What often confuses people is that exercise after hip surgery is not merely “more is better”. A 2021 meta-analysis of 32 trials found that standard postoperative exercise protocols often produced no significant self-reported functional gains. That doesn’t mean exercise is pointless. It means generic sheets and unfocused repetition aren’t enough.
Why some programmes help and others don’t
The difference usually comes down to three things:
- Personalisation matters. A retired person trying to manage stairs and a runner hoping to return to training don’t need the same plan.
- Progression matters. Muscles only adapt when the challenge changes at the right time.
- Consistency matters. A good programme done sporadically won’t outperform a simple one done properly.
Practical rule: Don’t judge your recovery by whether you’ve been given exercises. Judge it by whether those exercises match your stage, your symptoms, and your goals.
In clinic, the strongest recoveries usually come from patients who treat rehab as part of daily life rather than as an isolated task. They walk little and often. They practise the right movement patterns. They build strength gradually instead of chasing big sessions followed by pain and fatigue.
What early success actually looks like
In the first days, success is modest and important. It might be standing with better control, taking smoother steps with a walker, or getting in and out of bed without panicking. Later, the target becomes a more natural walking pattern. With consistent, targeted effort, restoring a normal walking stride is typically achievable by 3 months, as discussed in this earlier evidence summary and recovery guidance on total hip replacement recovery.
That’s why the best hip replacement exercises aren’t glamorous. They’re organised. They protect healing tissues early, then challenge the muscles that stop you limping, wobbling, or overloading your back.
If you’re motivated, busy, or keen to return to a high level of function, the key isn’t doing every exercise you’ve ever been shown. It’s doing the right ones, in the right order, with enough precision that your body changes.
Gentle Movements for Early Recovery (Weeks 0-6)
At this stage, a good day often looks quite ordinary. You get out of bed without a struggle, walk to the bathroom with better control, sit for breakfast, then do a few minutes of targeted movement before work calls, visitors, or a much-needed rest. That is early rehab done properly for a busy person. Small bouts, repeated well, usually beat one long session that leaves the hip sore and the rest of the day written off.
The aim in weeks 0 to 6 is straightforward. Keep blood flow moving, reduce stiffness, restore confidence on the operated leg, and start waking up the muscles that support a clean walking pattern. For professionals keen to get back to work and for active patients already thinking about golf, tennis, padel, hiking, or gym training, restraint matters here. Pushing too hard early often produces more swelling, more guarding, and poorer movement quality.
Early safety points that make day-to-day movement easier
Your surgeon or physio may give precautions based on your surgical approach and medical history. Within those limits, a few habits make recovery smoother:
- Keep turns slow and deliberate. Quick pivots are a common reason people feel unstable.
- Choose higher, firmer seats. They make standing easier and reduce awkward compensations.
- Use walking aids properly. A stick, crutches, or frame often improves mechanics rather than setting you back.
- Line yourself up before you move. Keep your chest, knee, and toes facing the same direction when standing or stepping.
- Stop chasing range. Early movement should feel controlled, not forced.
Patients who were very fit before surgery often struggle most with this phase mentally. The work looks simple, but simple done well lays the groundwork for strength, balance, and return to sport later on.
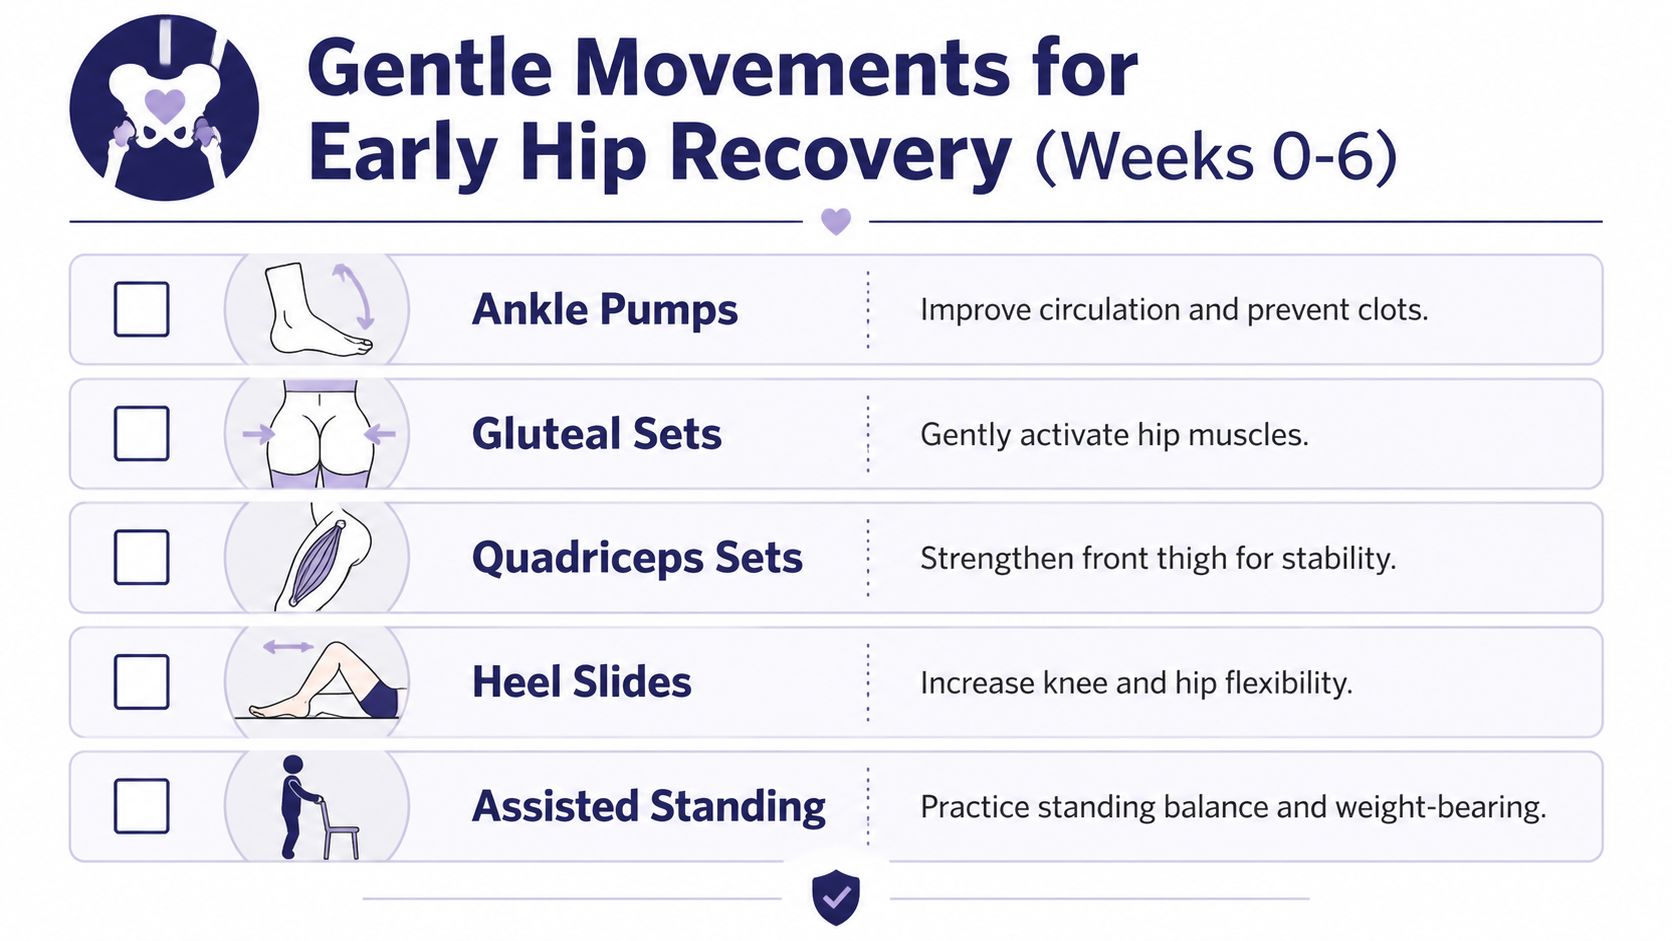
Five movements I want done well in the first six weeks
These exercises are low drama and high value. Done little and often, they help the hip settle while restoring basic muscle activation.
Ankle pumps
Move your feet up and down in sitting or lying. Use them regularly through the day, especially after time spent resting.Gluteal sets
Gently squeeze the buttock muscles, hold for a moment, then relax. This starts rebuilding the hip support you need for walking without a trunk sway.Quadriceps sets
With the leg straight, tighten the front of the thigh and press the knee gently towards the bed. This helps re-establish control for standing, transfers, and steadier steps.Heel slides
Slide your heel towards your body, then return slowly. Keep the movement easy and smooth. This helps with stiffness and improves confidence bending the hip.Supported standing weight shifts
Hold a solid surface and transfer your weight gently from one leg to the other. This is one of the best early drills for confidence on the operated side.
For readers who like a wider general primer on mobility and preparing your body for strength, this guide on preparing your body for strength is a useful companion to the early rehab mindset.
Frequent practice works better than occasional effort. Five calm minutes done three or four times a day is often enough early on.
Standing hip abduction, done cleanly
Standing hip abduction often appears early in rehab programmes, but technique matters more than height of lift. The goal is to train the muscles on the outside of the hip, not to let the lower back, shoulders, or pelvis do the job.
The Versus Arthritis guide to exercises after hip replacement includes this type of movement as part of early rehabilitation. In clinic, the common errors are easy to spot. The body leans away from the operated side, the toes turn out, or the leg swings too far. Once that happens, the exercise stops training what it should.
Use this sequence:
- Stand tall with both hands on a stable support.
- Keep the pelvis level and your toes pointing forwards.
- Brace gently through the trunk without holding your breath.
- Move the operated leg out to the side a short distance.
- Pause briefly, then lower with control.
A smaller movement is usually the better movement here. If you feel it more in your back than in the side of your hip, reduce the range and slow the tempo.
A realistic daily structure
Most busy patients do better with short exercise blocks tied to the day rather than waiting for the perfect rehab window.
- Morning: ankle pumps, gluteal sets, quadriceps sets before you fully get going
- Mid-morning: short walk, then heel slides once you sit down again
- Afternoon: supported standing weight shifts and standing hip abduction
- Evening: another short walk and a brief reset of the bed exercises if the hip feels stiff
If swelling builds as the day goes on, trim the volume slightly and keep the pattern. That trade-off usually works better than doing too much on a good morning, then skipping the next day because the joint feels irritated. Ice, sensible pacing, hydration, protein intake, and regular position changes all help. Early recovery is physical, but it also responds well to a calm routine and realistic expectations.
Progressive Strengthening from Week 6 to 12
By this stage, the question shifts from “Can I move safely?” to “Can I build enough strength to move well?” That’s an important difference. Walking without much pain isn’t the same as walking with proper pelvic control, a normal stride, and enough reserve for work, stairs, shopping, or sport.
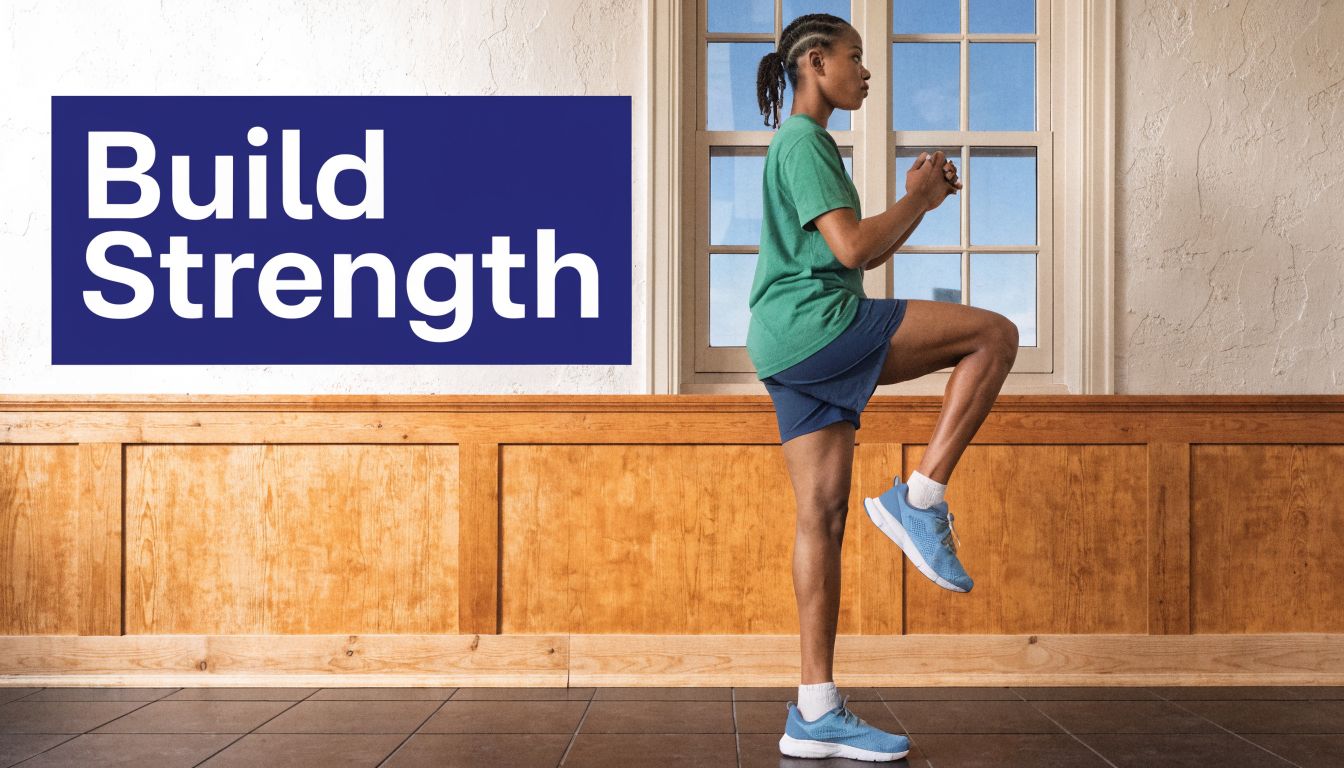
A good strength phase is progressive but not reckless. In this phase, resistance bands, controlled single-leg work, and more functional patterns start to earn their place.
What the evidence supports
A 2019 randomised controlled trial showed what structured progressive resistance can do after total hip replacement. Patients in a 16-week programme improved their 6-minute walk test distance by 23.4%, compared with 9.4% in the control group. Their HOOS Jr score improved by 103%. That’s the sort of change patients notice in real life. Better walking tolerance, better confidence, better function.
The same study used a progressive resistance approach built around exercises such as hip abduction, leg press, and extension. That matters because week 6 onwards is where many recoveries either sharpen up or stall out. If the programme stays too easy, the muscles don’t catch up with the demands of normal life.
The exercises that usually matter most
I’d prioritise movement quality first, then load.
Bridges
Lie on your back with knees bent and feet planted. Tighten your buttocks, lift your pelvis, pause, then lower slowly. This builds glute strength without asking for complex balance.
Mini-squats
Use a kitchen counter or sturdy surface for support. Sit back slightly, keep the movement small, and return to standing under control. These train the pattern you use for chairs, toilets, and stairs.
Band-resisted hip abduction
The earlier standing abduction pattern now becomes more useful if you can keep the pelvis level. Add a light band only when the unresisted version is clean.
Supported single-leg stance
Stand on the operated leg with fingertip support. The aim isn’t bravado. The aim is teaching the hip to stop the pelvis dropping when the other foot leaves the floor.
If an exercise makes you wobble, twist, or hold your breath, regress it. Strength only counts if the target muscles are doing the work.
How to know when to progress
Use these checks rather than guessing:
| Sign | What it suggests | What to do |
|---|---|---|
| Movement feels easy and controlled | Current load may be too low | Add light band resistance or a few reps |
| You can’t keep the pelvis level | Glute control isn’t ready | Reduce range, slow down, use support |
| You’re sore for too long after sessions | Total load is too high | Cut volume before cutting all exercise |
| Walking still looks uneven | Strength isn’t translating to gait | Include balance and single-leg control work |
A practical weekly pattern
Strengthening works well when split across the week rather than piled into one long session.
- Two to three focused strength sessions with bridges, mini-squats, band work, and balance drills
- Regular walking to turn strength gains into better movement
- Short mobility practice to stop the hip stiffening between sessions
If you’re a professional with limited time, a compact routine often beats an ambitious one you skip. If you’re athletic, this phase can feel deceptively simple, but don’t rush into impact work before your hip and pelvis can control load on one leg.
Common mistakes in this phase
Some errors show up again and again:
- Adding resistance too early when bodyweight control isn’t there yet
- Chasing depth in squats instead of smoothness
- Ignoring the non-operated side, which also needs strength and coordination
- Treating walking as enough, when walking alone often won’t rebuild the hip abductors properly
The progress you want in weeks 6 to 12 is visible. A smoother stride. Better single-leg confidence. Easier stairs. Less dependence on the lower back for stability. That’s what progressive strengthening is for.
Advanced Recovery for Athletes and Professionals
Generic rehabilitation usually gets people through basic recovery. It often doesn’t get them back to a demanding job, frequent travel, or a confident return to sport. That gap matters.

The UK data shows why an individualized plan is worth taking seriously. Only 28% of working-age hip replacement recipients receive occupational rehab guidance, and a 2025 BMJ study in South West England found that athlete-specific progressions reduced return-to-play time by 35% versus standard rehab, as summarised in this overview on exercise and activity progression after hip replacement. In practice, many people who need the most specific guidance get the least.
Busy professionals need efficient rehab
If your day is full of meetings, commuting, or long desk hours, your programme has to fit real life. A workable format is a 20 to 30 minute circuit built around:
- A strength block with bridges, mini-squats, and banded abduction
- A balance block with supported single-leg stance and controlled weight shifts
- A walking block with a deliberate focus on stride length and upright posture
This isn’t a watered-down plan. It’s a realistic one. Short, repeatable sessions done consistently usually beat a perfect one-hour programme that never happens.
The best rehab plan is the one your calendar can tolerate for weeks, not the one that looks impressive on paper.
Two additional habits help office-based patients more than they expect:
- Movement breaks during the day so the hip doesn’t stiffen into flexion
- Chair and car set-up that avoids low, cramped positions after long periods sitting
Athletes need more than basic strengthening
Sport asks for deceleration, rotation control, impact tolerance, and confidence under fatigue. A basic post-op sheet won’t cover that. Once foundational strength and gait control are in place, advanced work often includes proprioception drills, step-downs, controlled changes of direction, and gradual landing mechanics.
For runners in particular, the return is smoother when strength work continues alongside mileage. This practical guide on essential strength training for runners fits well with the later stages of hip rehab because it reinforces the role of hips, glutes, and trunk control in keeping stride mechanics tidy.
Who benefits most from specialist progression
Three groups usually need more than generic advice:
Professionals with a hard return-to-work deadline
They need rehab that fits around fixed obligations and addresses desk posture, commuting, and fatigue.Recreational athletes who don’t want to lose identity as active people
They often recover physically, but hold back because no one has rebuilt confidence for sport-specific movement.Competitive athletes
They need a staged route back that respects the joint while rebuilding performance qualities in the right order.
The broad message is simple. If your life or sport places higher demands on the hip, your rehab has to be specific enough to match them. Otherwise you may recover, but still feel limited.
Nutrition and Mindset for Optimal Healing
Exercises load the tissues, but recovery depends on what supports those tissues between sessions. That includes food, sleep, stress levels, and the way you manage the mental side of rehabilitation. Many people underestimate this part, especially if they’re used to pushing through.
A recent 2025 Lancet Rheumatology trial summary found that patients who combined resistance exercise with optimised daily vitamin D intake improved hip function scores by 27% more than those doing exercise alone. That’s especially relevant because NHS England data cited in the same summary notes 18% higher complication rates in vitamin D-deficient patients, and 31% of urban adults in Bristol were affected.
Food that helps recovery rather than just filling the gap
After surgery, appetite can dip and routines can become chaotic. Even so, your body still needs the basics to repair tissue and rebuild muscle.
Focus on:
- Protein at regular meals to support muscle repair after exercise
- Vitamin D and calcium intake guided appropriately, especially if deficiency is a concern
- Fruit, vegetables, pulses, nuts, and oily fish to support overall recovery and general health
- Adequate fluids because dehydration tends to worsen fatigue and make activity feel harder
If you want a practical food-focused companion to the exercise side of rehab, this guide on best foods for muscle recovery is a sensible place to start.
Sleep and stress are part of the programme
Poor sleep changes everything. Pain feels louder, motivation drops, and exercises that were manageable start to feel heavy. Your sleeping set-up can make a difference, particularly if side sleeping or pressure around the hip is interrupting the night. While it isn’t a medical source, this article on NZ Bed Company hip pain mattress choice may help you think more clearly about support, pressure relief, and sleep comfort during recovery.
Recovery also has a mental rhythm. Some days are encouraging. Others feel flat for no obvious reason. That doesn’t mean you’re failing. It usually means the process is doing what recovery does. A few habits make that easier:
- Keep a simple rehab log so progress is visible even when the day feels slow
- Use small targets such as smoother sit-to-stands or a better quality walk
- Pair exercise with a cue like after breakfast or before lunch so it becomes automatic
- Use calm breathing before difficult movements if fear or guarding is making the hip stiff
Recovery improves when the nervous system feels safe enough to let you move well.
A whole-person approach doesn’t replace exercise. It makes exercise work better.
Sample Exercise Routines and Safety Precautions
A sample routine helps remove guesswork. The exact exercises should still match your surgeon’s advice, symptoms, and stage of healing, but a phased structure helps individuals stay on track.
Sample phased hip replacement exercise routines
| Phase | Exercise | Sets x Reps | Frequency / Notes |
|---|---|---|---|
| Weeks 1-2 | Ankle pumps | Gentle repetitions | Regularly through the day for circulation |
| Weeks 1-2 | Gluteal sets | Short holds | Several times daily |
| Weeks 1-2 | Quadriceps sets | Short holds | Several times daily with the leg supported |
| Weeks 1-2 | Heel slides | Controlled repetitions | Daily within a comfortable range |
| Weeks 1-2 | Assisted standing and short walks | Brief bouts | Little and often, using prescribed walking aid |
| Weeks 7-8 | Bridges | Controlled repetitions | A few focused sessions across the week |
| Weeks 7-8 | Mini-squats | Controlled repetitions | Use support if needed |
| Weeks 7-8 | Standing hip abduction | 3 x 10 | Keep the pelvis level and trunk upright |
| Weeks 7-8 | Supported single-leg stance | Timed holds | Prioritise quality over duration |
| Weeks 7-8 | Walking practice | Steady bouts | Focus on stride symmetry and posture |
Red flags you shouldn’t ignore
Stop the exercise session and seek clinical advice if you notice:
- Sharp or sudden pain that feels different from expected post-exercise soreness
- Rapidly increasing swelling that doesn’t settle with rest
- Wound concerns such as discharge, increasing redness, or feverish symptoms
- Calf pain, unusual swelling, or breathlessness, which needs urgent medical assessment
- A sense that the hip has shifted, given way, or become unstable
The sensible rule on soreness
Mild muscular ache is common. A marked increase in pain that alters your walking, disturbs sleep, or lingers into the next day usually means the dose was too high. Reduce range, reps, or resistance first. Don’t abandon movement altogether unless a clinician has told you to stop.
Most recoveries go better when patients stay engaged, pace themselves appropriately, and treat warning signs seriously rather than trying to tough them out.
Frequently Asked Questions About Hip Replacement Recovery
Recovery is usually steadier than it feels in the moment. Most patients improve by accumulating many ordinary wins. Better standing balance, easier stairs, less limping, more confidence getting out of the car. The process is rarely linear, but it is manageable.
When can I drive again
Drive only when you can get in and out of the car safely, control the pedals properly, and perform an emergency stop comfortably. You also need to be off medication that would impair driving. Your surgeon or treating clinician should confirm when that’s appropriate for you.
What’s the best sleeping position
Many people are most comfortable on their back early on, or on the non-operated side if they’ve been told that’s safe and can keep the hip supported. Pillows can help with alignment and comfort. The main aim is avoiding awkward twisting and finding a position you can maintain without repeatedly waking in pain.
When can I return to sex
This varies depending on pain, mobility, confidence, and any movement precautions you’ve been given. The sensible rule is to wait until everyday movements are more comfortable and you can position yourself without strain. If you’re unsure, ask directly at follow-up. It’s a common question and worth getting individualized guidance.
Will airport security be an issue
It can be. Some people with joint replacements do trigger scanners. If you’re travelling, allow a little extra time and tell security staff you’ve had a hip replacement. Your surgical paperwork can be useful to keep with you, although procedures vary.
How long until walking feels normal
That depends on strength, pelvic control, and confidence as much as the joint itself. Some patients can walk independently quite early but still have a slight limp because the hip muscles haven’t fully caught up. A normal stride comes from repetition, not rushing.
If you want personalised support with hip replacement exercises, return-to-work planning, sports rehabilitation, or broader recovery advice, The Lagom Clinic offers a proactive, whole-person approach in Bristol with time to address movement, nutrition, stress, and long-term health properly.


 Members Consultation